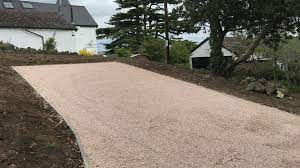
Salt is an excellent de-icer for snow and ice on gravel driveways, as it helps to lower the freezing point of water and melt ice quickly. However, salting a gravel driveway requires some special considerations to ensure effective and safe de-icing without damaging the driveway or harming the environment. In this article, we will discuss how to salt a gravel driveway like a pro.
Choose the Right Type of Salt:
Not all salts are created equal, and some types of salt can damage a gravel driveway or harm the environment. For example, rock salt can cause erosion and damage to concrete surfaces, while calcium chloride can harm plants and animals. A better option for a gravel driveway is magnesium chloride, which is less corrosive and environmentally friendly.
Prepare the Driveway:
Before salting, it’s essential to prepare the driveway by removing any loose snow or ice with a shovel or snow blower. This will ensure that the salt can penetrate the surface and melt the ice effectively. Also, make sure to clear any obstacles or debris from the driveway, such as rocks or tree branches, to prevent them from getting caught in the snowblower or damaging the driveway.
Apply Salt at the Right Time:
Timing is essential when salting a gravel driveway. Salt is most effective when applied before or during a snowstorm, as it can prevent snow and ice from sticking to the surface. If the driveway is already covered in snow or ice, it’s best to wait until after the snowstorm has ended before applying salt. This will prevent the salt from getting buried under the snow and reduce its effectiveness.
Use the Right Amount of Salt:
Using too much salt can damage the driveway, harm nearby plants and animals, and increase the risk of water pollution. A good rule of thumb is to use one pound of salt per 100 square feet of driveway. This amount can vary depending on the severity of the snow and ice, so adjust accordingly.
Apply Salt Evenly:
To ensure effective de-icing, it’s important to apply salt evenly across the driveway. One way to do this is to use a broadcast spreader or a handheld spreader. Walk at a slow and steady pace while spreading the salt, making sure to cover the entire surface. Avoid over-applying the salt in one spot, as this can lead to salt buildup and damage the driveway.
Don’t Forget the Edges:
The edges of the driveway are often the first to freeze and the last to melt, so it’s essential to apply salt to these areas as well. Use a handheld spreader or a small shovel to apply salt to the edges of the driveway, making sure to cover all the corners and curves. gravel driveways
Avoid Overusing Salt:
While salt is an effective de-icer, overusing it can harm the environment and damage the driveway. Too much salt can lead to runoff, which can pollute nearby water sources and harm plants and animals. Additionally, excessive salt can corrode metal parts of cars and cause rust. Use salt in moderation and only as needed. gravel driveways
Clean Up Excess Salt:
After salting, make sure to clean up any excess salt that may have accumulated on the driveway or nearby areas. This will prevent salt buildup and potential damage to the driveway. Also, avoid dumping excess salt on nearby grass or plants, as this can harm them.
Consider Alternatives:
While salt is a popular and effective de-icer, there are alternatives that may be more environmentally friendly and less damaging to the driveway. Some options include sand, kitty litter, or even sugar beet juice, which is a natural de-icer. Consider using these alternatives if you are looking for a more eco-friendly option.
In conclusion, salting a gravel driveway requires some special considerations to ensure effective and safe de-icing. By choosing the right type of salt, preparing the driveway, applying salt at the right time and amount, spreading it evenly, and cleaning up excess salt, you can salt your gravel driveway like a pro. It’s also essential to avoid overusing salt, consider alternatives, and protect the environment and the driveway from potential harm.

