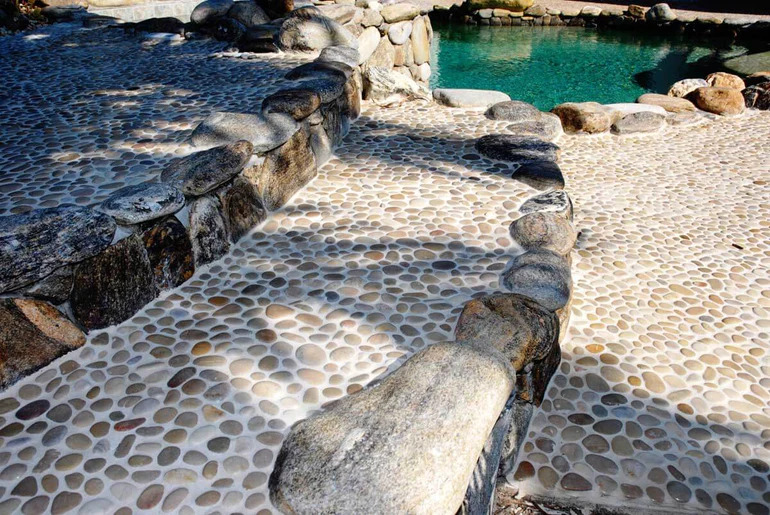
Pebble tile, with its natural and earthy appeal, has become a popular choice for adding texture and character to various spaces, from shower floors to backsplashes. While the installation of pebble tiles is a creative and aesthetic endeavor, the grouting process plays a crucial role in both securing the tiles and enhancing the overall look. In this comprehensive guide, we will explore the steps, tips, and considerations involved in grouting pebble tile to achieve a polished and professional finish.
1. Understanding Pebble Tile:
Before delving into the grouting process, it’s essential to understand the unique characteristics of pebble tile. Pebble tiles are made from small, smooth stones or pebbles adhered to a mesh backing. This mesh allows for flexibility, making them suitable for irregular surfaces, such as shower floors.
2. Selecting the Right Grout:
Choosing the right grout is a critical first step. Opt for a sanded grout for pebble tiles to ensure a strong bond and support for the irregular surface. Sanded grout contains fine sand particles, providing stability and preventing shrinkage during the curing process. The color of the grout also significantly impacts the final look, so consider whether you want a grout that complements or contrasts with the pebble tiles.
3. Preparing the Pebble Tile Surface:
Ensure that the surface of the pebble tile is clean and free of any debris or adhesive residue before grouting. Use a damp sponge or cloth to wipe down the tiles and remove any dust or loose particles. Allow the tiles to dry completely before proceeding with the grouting process.
4. Applying a Grout Release:
To make the grout removal process easier, especially with natural stone pebbles, consider applying a grout release before grouting. A grout release creates a barrier that prevents the grout from adhering too strongly to the surface of the pebbles. Follow the manufacturer’s instructions for application and drying times.
5. Mixing the Grout:
Follow the manufacturer’s guidelines for mixing the grout. Typically, sanded grout requires a specific water-to-grout ratio. Use a mixing paddle and a drill to achieve a smooth and lump-free consistency. Allow the mixed grout to sit for a few minutes before applying to ensure proper hydration.
6. Applying the Grout:
Using a rubber float or a grout float, apply the mixed grout to the pebble tiles, pressing it into the spaces between the stones. Work in small sections to prevent the grout from drying before you can complete the entire surface. Hold the float at a 45-degree angle and move it diagonally across the tiles to ensure even coverage.
7. Pressing the Grout into the Gaps:
Given the irregular surface of pebble tiles, pressing the grout into the gaps may require more attention than with traditional tiles. Use the edge of the float or your fingers to ensure that the grout penetrates the spaces between the pebbles. Work methodically to fill all the gaps and achieve a consistent look.
8. Cleaning Excess Grout:
After applying the grout, wait for it to set according to the manufacturer’s instructions. Once the grout reaches a firm consistency, use a damp sponge to remove excess grout from the surface of the pebble tiles. Rinse the sponge frequently and avoid pressing too hard to prevent pulling the grout from the gaps.
9. Sealing the Grout:
Sealing the grout is a crucial step in ensuring its longevity and preventing stains. Once the grout has fully cured, typically after 72 hours, apply a grout sealer using a small brush or applicator. The sealer helps protect the grout from moisture, mold, and discoloration. Follow the specific instructions provided by the sealer manufacturer.
10. Polishing the Pebble Tile Surface:
After the grout has fully cured and the sealer has been applied, use a soft, dry cloth to polish the surface of the pebble tiles. This step enhances the natural luster of the stones and provides a finished and cohesive appearance.
11. Troubleshooting:
If you encounter issues such as hazing or a filmy residue on the surface after grouting, it may be necessary to use a grout haze remover. Follow the product’s instructions carefully to address any residual grout on the tiles.
12. Tips for Success:
- Work in small sections to prevent the grout from drying before completion.
- Keep a bucket of clean water and a sponge nearby to clean the float and wipe the tiles as you go.
- Use a grout bag or a pastry bag to fill in tight or intricate spaces between pebbles.
- Periodically step back and assess the overall appearance to ensure consistency in grout application.
Conclusion:
Grouting pebble tile is both an art and a science, requiring attention to detail and a careful approach to achieve a polished and professional finish. By understanding the unique characteristics of pebble tiles, selecting the right grout, and following the step-by-step process outlined in this guide, homeowners and DIY enthusiasts can transform their spaces with a beautiful and durable pebble tile installation that stands the test of time.

