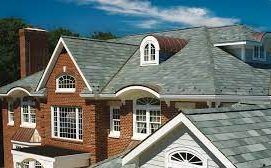
Truslate roofing is a unique and beautiful roofing option that can transform the look and feel of any home. Truslate roofing is made from natural slate that is quarried and cut into thin pieces that are reinforced with a fiberglass backing. This process creates a roofing material that is lightweight, easy to install, and extremely durable.
If you’re interested in installing Truslate roofing on your home, here is a step-by-step guide to help you get started:
Measure your roof
The first step in installing Truslate roofing is to measure your roof to determine how much material you will need. You can do this by measuring the length and width of each section of your roof and then multiplying those numbers together to get the total square footage.
Choose your Truslate color and style
Translate comes in a variety of colors and styles, so you’ll want to choose one that complements the style and color of your home. Some popular colors include green, gray, black, and brown.
Prepare your roof
Before installing Truslate, you’ll need to prepare your roof. This involves removing any old roofing material and repairing any damaged areas of the roof. You’ll also want to install a moisture barrier to prevent water from penetrating the roof.
Install the underlayment
The next step is to install the underlayment. This is a layer of material that is installed on top of the moisture barrier to provide additional protection against water infiltration. The underlayment is typically made of synthetic material or felt.
Install the Truslate roofing
Once the underlayment is in place, you can begin installing the Truslate roofing. Truslate is installed using a system of interlocking tiles. The tiles are designed to overlap and interlock with each other to create a waterproof barrier.
Cut the tiles
As you install the Truslate tiles, you’ll need to cut them to fit around obstacles such as chimneys, vents, and skylights. You can use a tile cutter or a circular saw to cut the tiles to the correct size and shape.
Install the ridge cap
The final step in installing Truslate roofing is to install the ridge cap. This is a special type of tile that is designed to cover the ridge of the roof and provide a finished look. The ridge cap is installed using a special adhesive and is secured in place with screws.
In conclusion
Translate Roofing is an excellent choice for homeowners who want a durable, long-lasting, and beautiful roofing option. With proper installation and maintenance, Truslate can last for decades and provide your home with the protection it needs while adding to its overall aesthetic appeal. If you’re considering Truslate roofing for your home, be sure to work with a qualified roofing contractor who has experience installing this unique material.

